Community resources
Community resources
How to manage your subfolders in QAlity Plus
The better organized your test cases are, the higher effectiveness can your team achieve. No tester likes to spend their time on tedious searching for the tests that shouldn’t have been that hard to find in the first place. Well-organized testing benefits not only the team, but also the end-users, who receive a thoroughly checked product faster.
Since we’ve already covered all main functionalities of QAlity Plus Test Case Repository and folders, in this article we’ll be focusing solely on the newest addition - subfolders. Please check the linked article for more information.
Folders and subfolders navigation
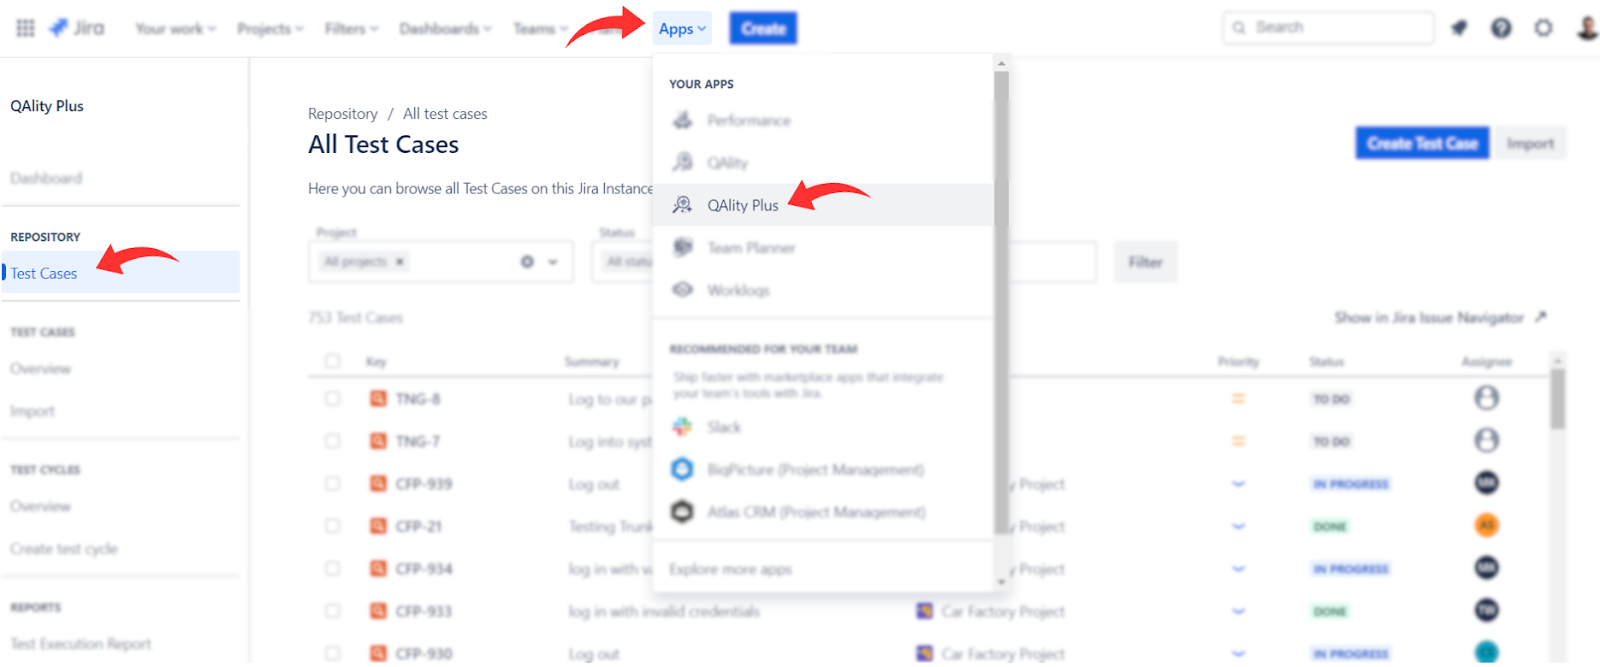
For managing folders and organizing their contents, your center of operations will be the Test Case Repository. To find it, open the QAlity Plus app, and search for Repository -> Test Cases in the navigation bar on the left.
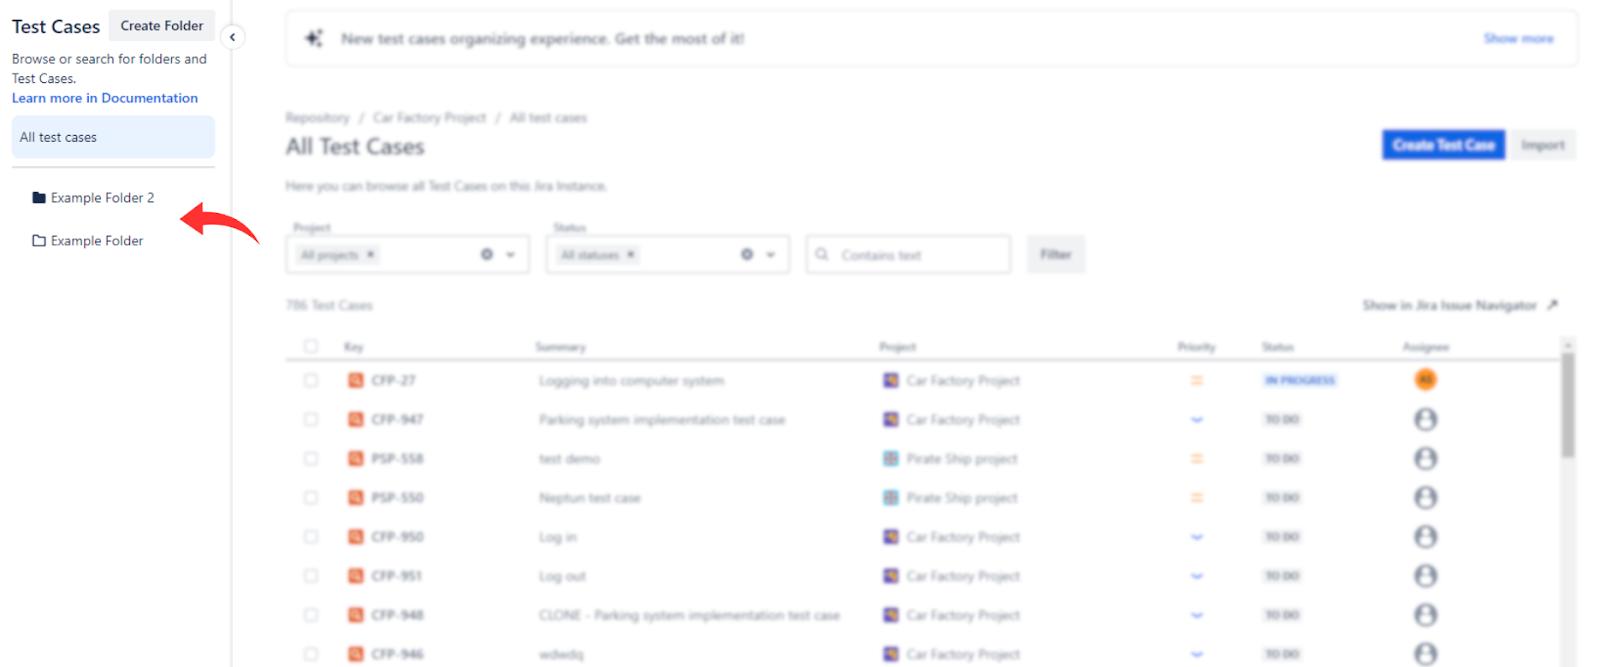
You will see two main areas - folders navigation bar on the left, and All Test Cases in the middle.
The panel on the left serves as your main navigation through your folders structure. Whenever you create a new folder, it will appear at the top of the list. Folders that are empty have a hollow icon next to them to be easily distinguishable from the ones containing items.
You can choose how many details of your folder structure you want to see on the navigation panel. Use arrow icons next to the folders names to fold or unfold the list of subfolders. You can do that for every level of your structure.
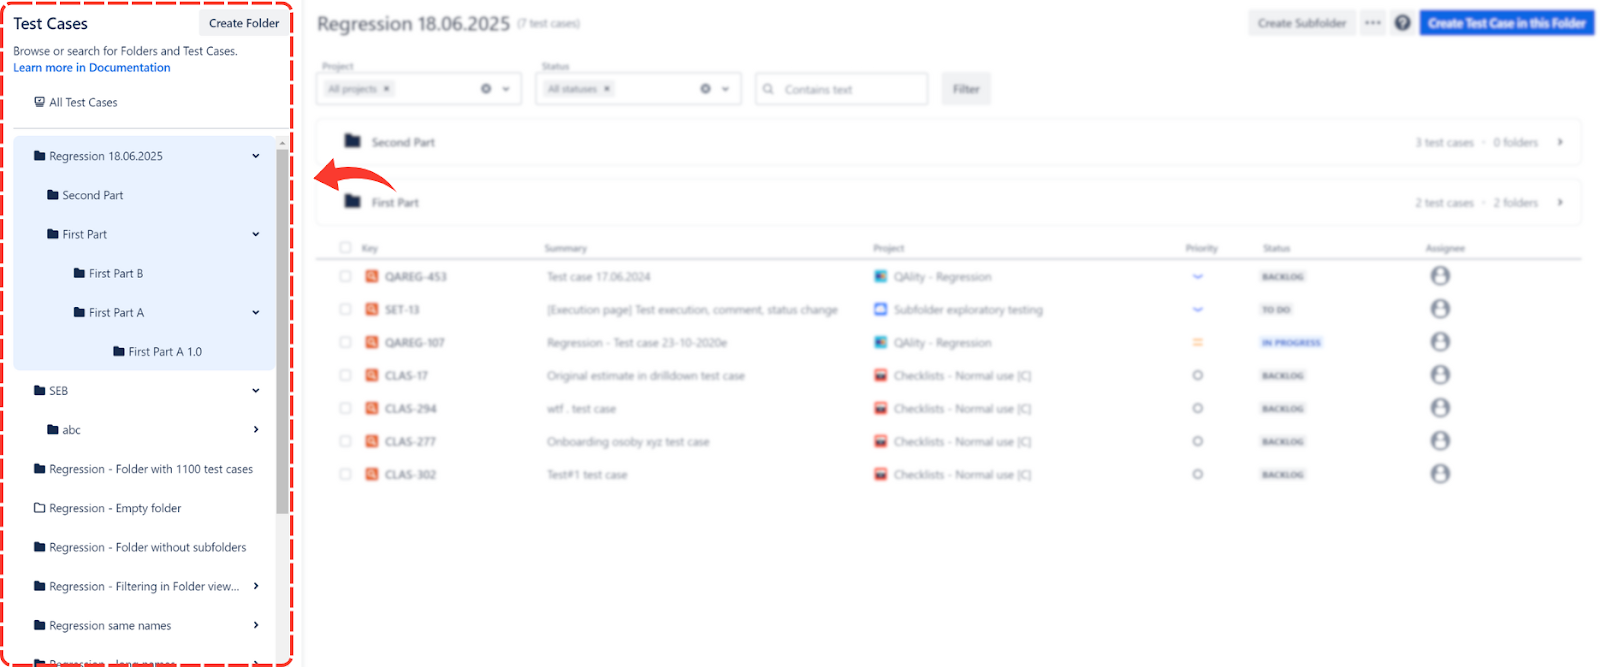
To see the contents of a folder, click on it. If the folder contains subfolders, they will be all displayed for you to see. You can adjust the view to your needs by expanding or collapsing the contents of subfolders. Each subfolder will have information on the number of contained test cases and subfolders attached.
You can also open subfolders separately by clicking on the Open folder button.
Creating and deleting subfolders
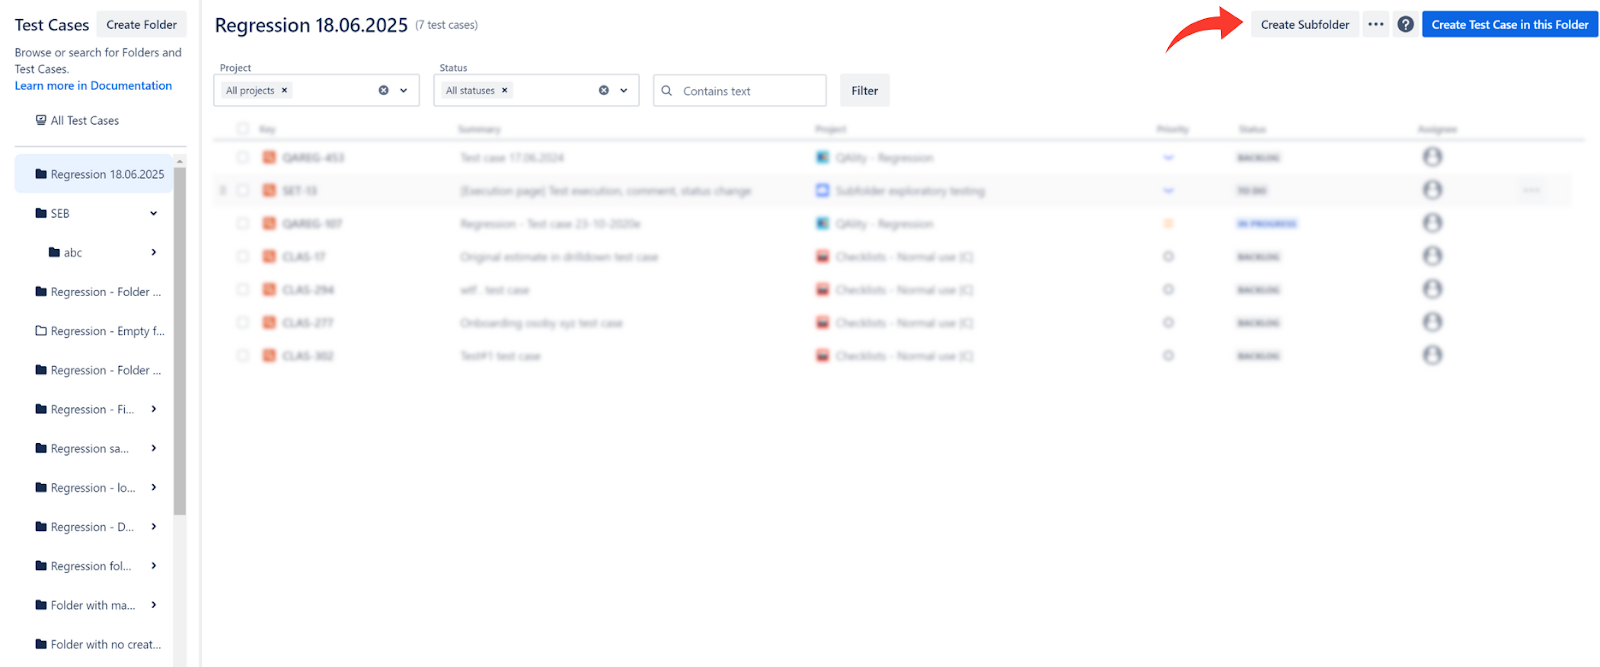
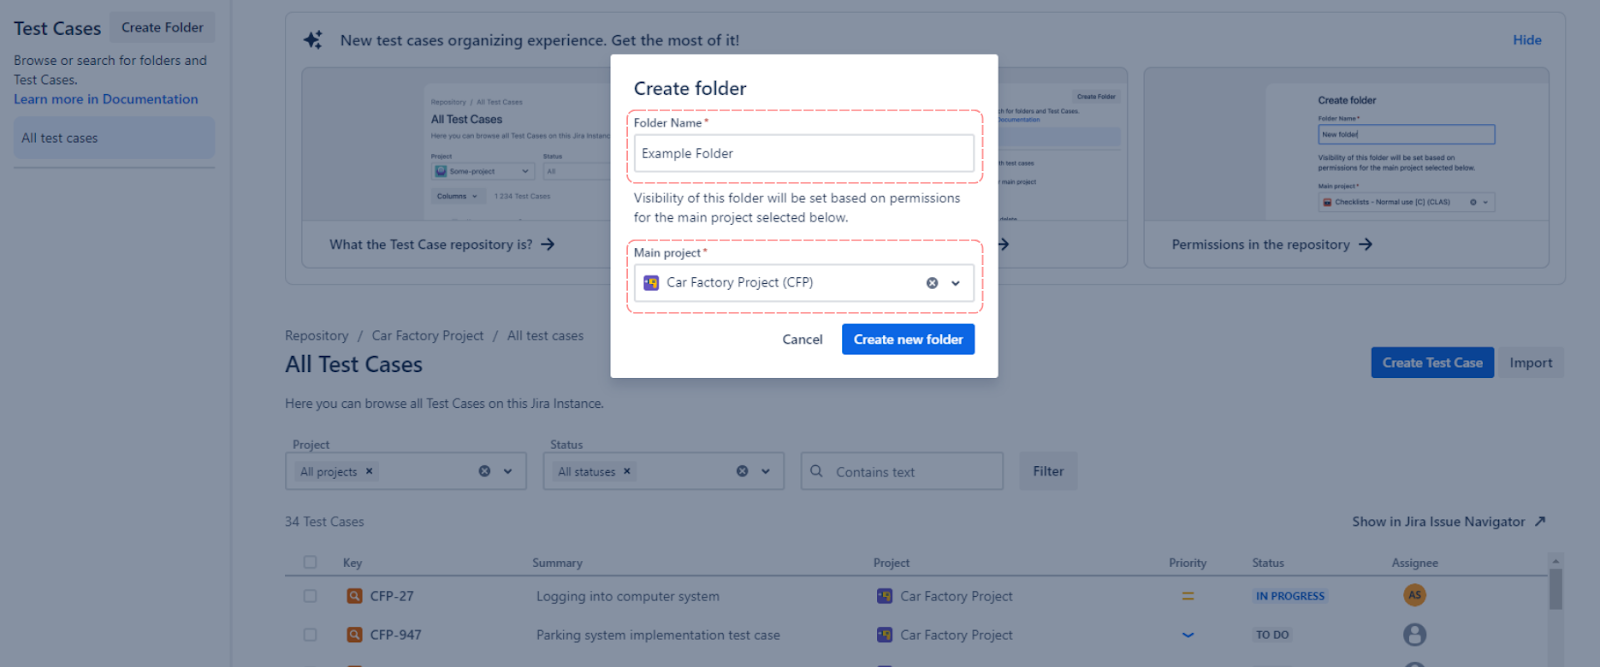
Creating subfolders is just as easy as creating folders. You can do that by entering a folder in which you want to create a subfolder, and clicking the Create Subfolder button. There is no limit to how granular your folder structure will be. You can create as many folders and subfolders as you like. It allows you to create a multi-leveled folder structure adjusted to your needs.
Folder names don’t have to be unique, and you can easily change them via inline editing. Keep in mind that subfolder permissions will always reflect the permissions of the main folder.
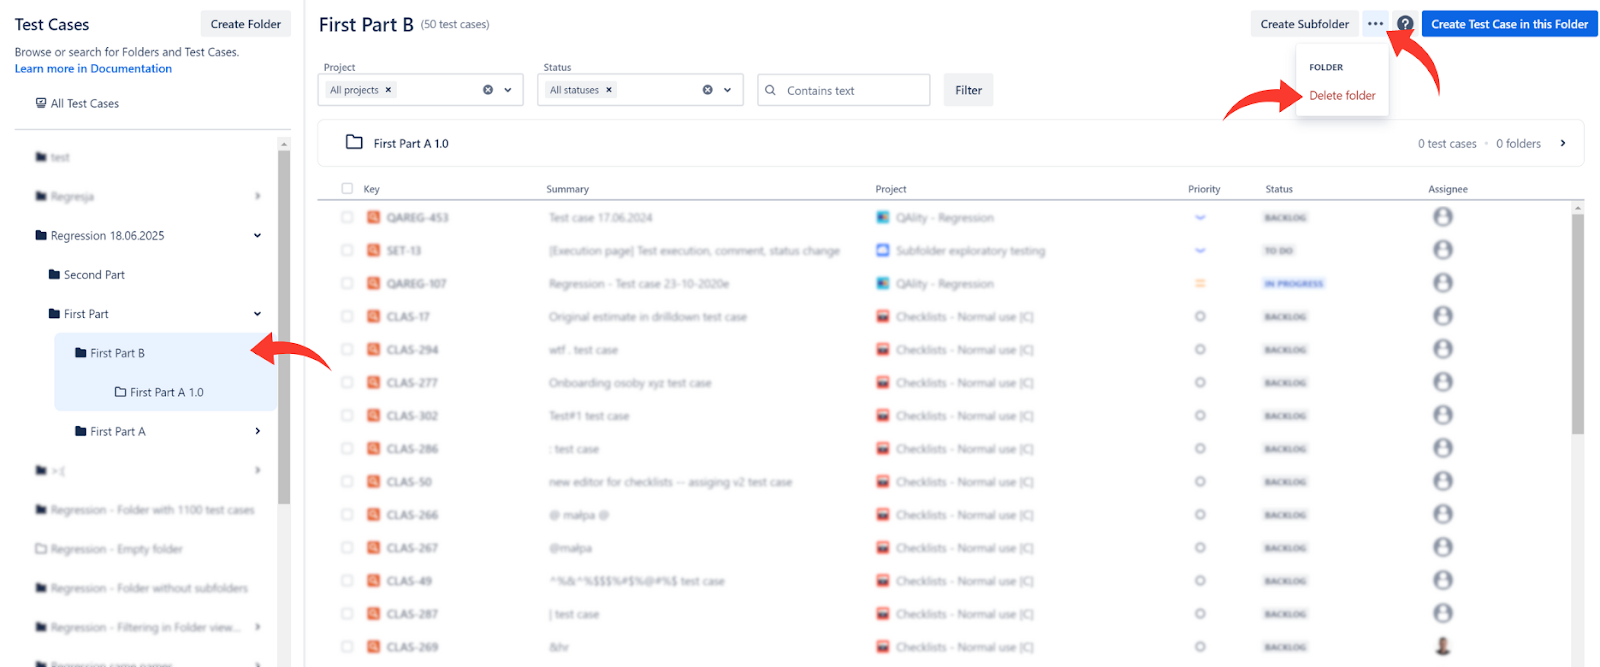
You can delete any folder or subfolder by selecting the Delete folder option in a three dots menu. Deleting a folder or subfolder will be equal to deleting all subfolders that it contains. However, don’t worry about your test cases - they will still be available in the Repository -> All Test Cases.
Adding test cases to folders and subfolders
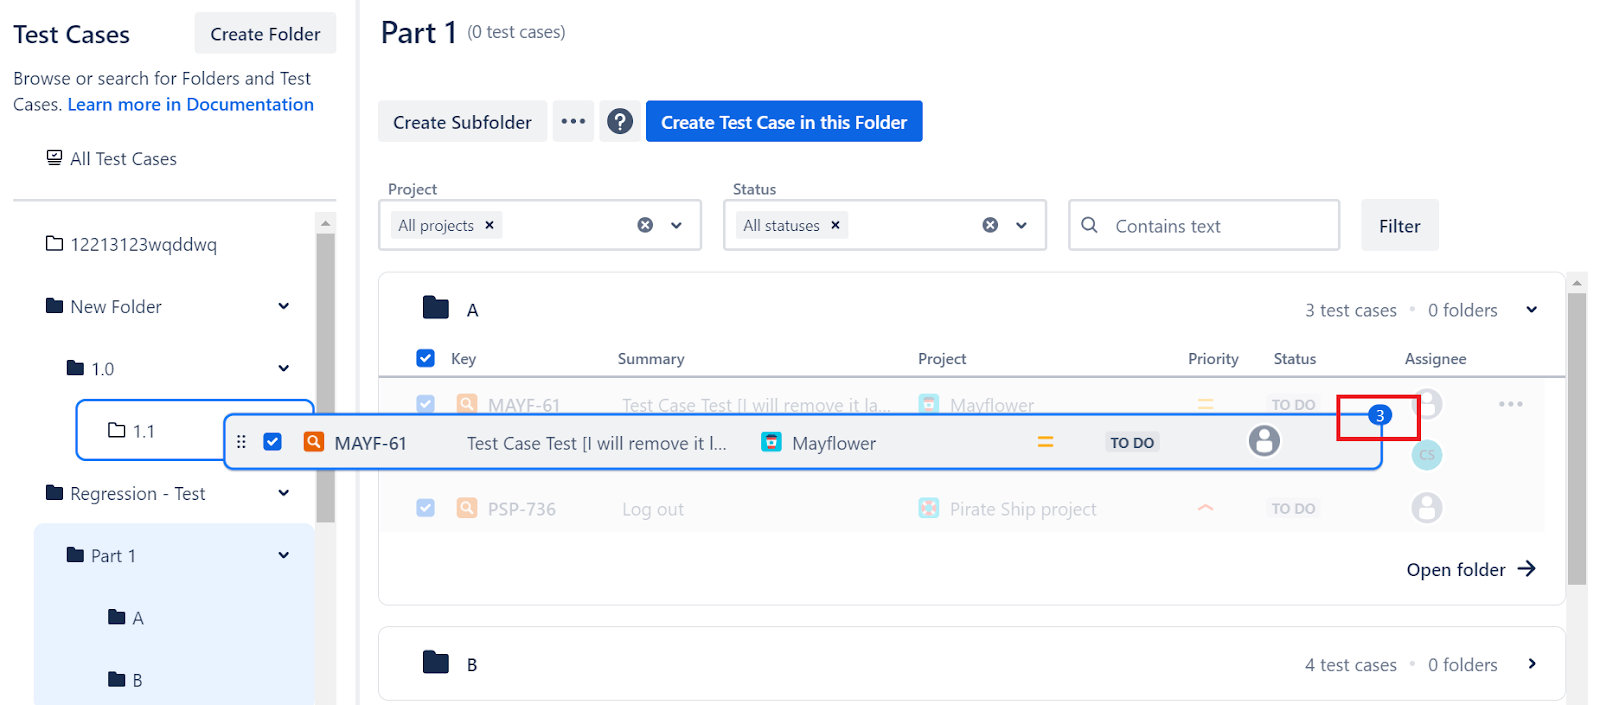
You can add test cases to folders and subfolders by simply dragging and dropping them. It can be done both for a single test case, and for multiple test cases at once.
Please keep in mind that this action duplicates the test cases, meaning that they’ll be now visible in the folder you dragged them from as well as the folder in which you dropped them.
The number in the right corner of the dragged bar indicates how many test cases you’re duplicating in bulk.
The same action can be achieved by selecting test cases and clicking the Add to folder button at the bottom right corner.

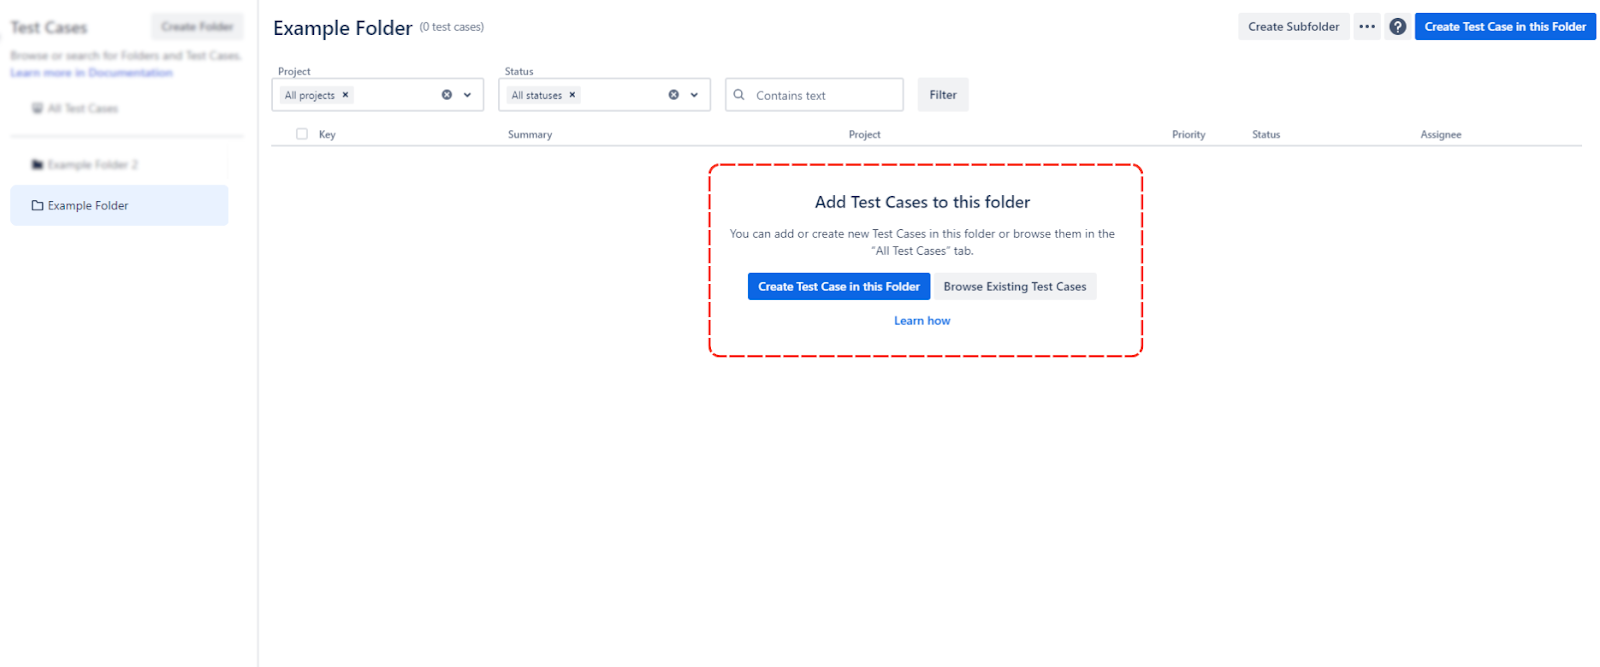
You can also add test cases to a folder by opening the folder, and choosing one of the two options:
-
Create Test Case in this Folder
-
Browse Existing Test Cases
Additional actions
Import & export
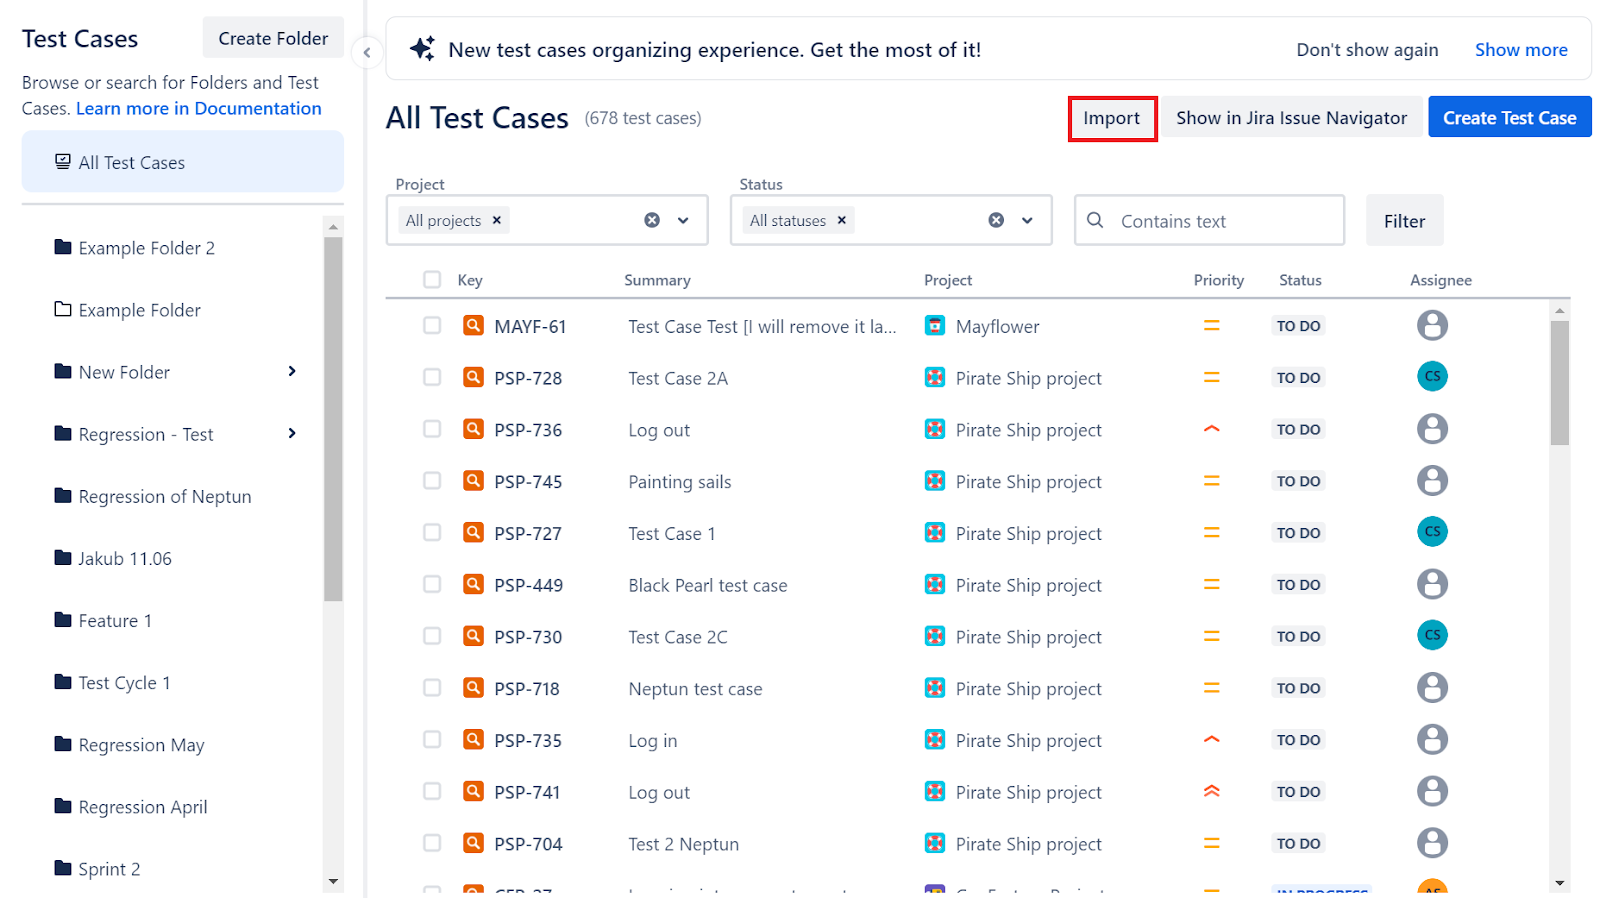
You can easily import test cases from a CSV file. To do that, head to All Test Cases -> Import.
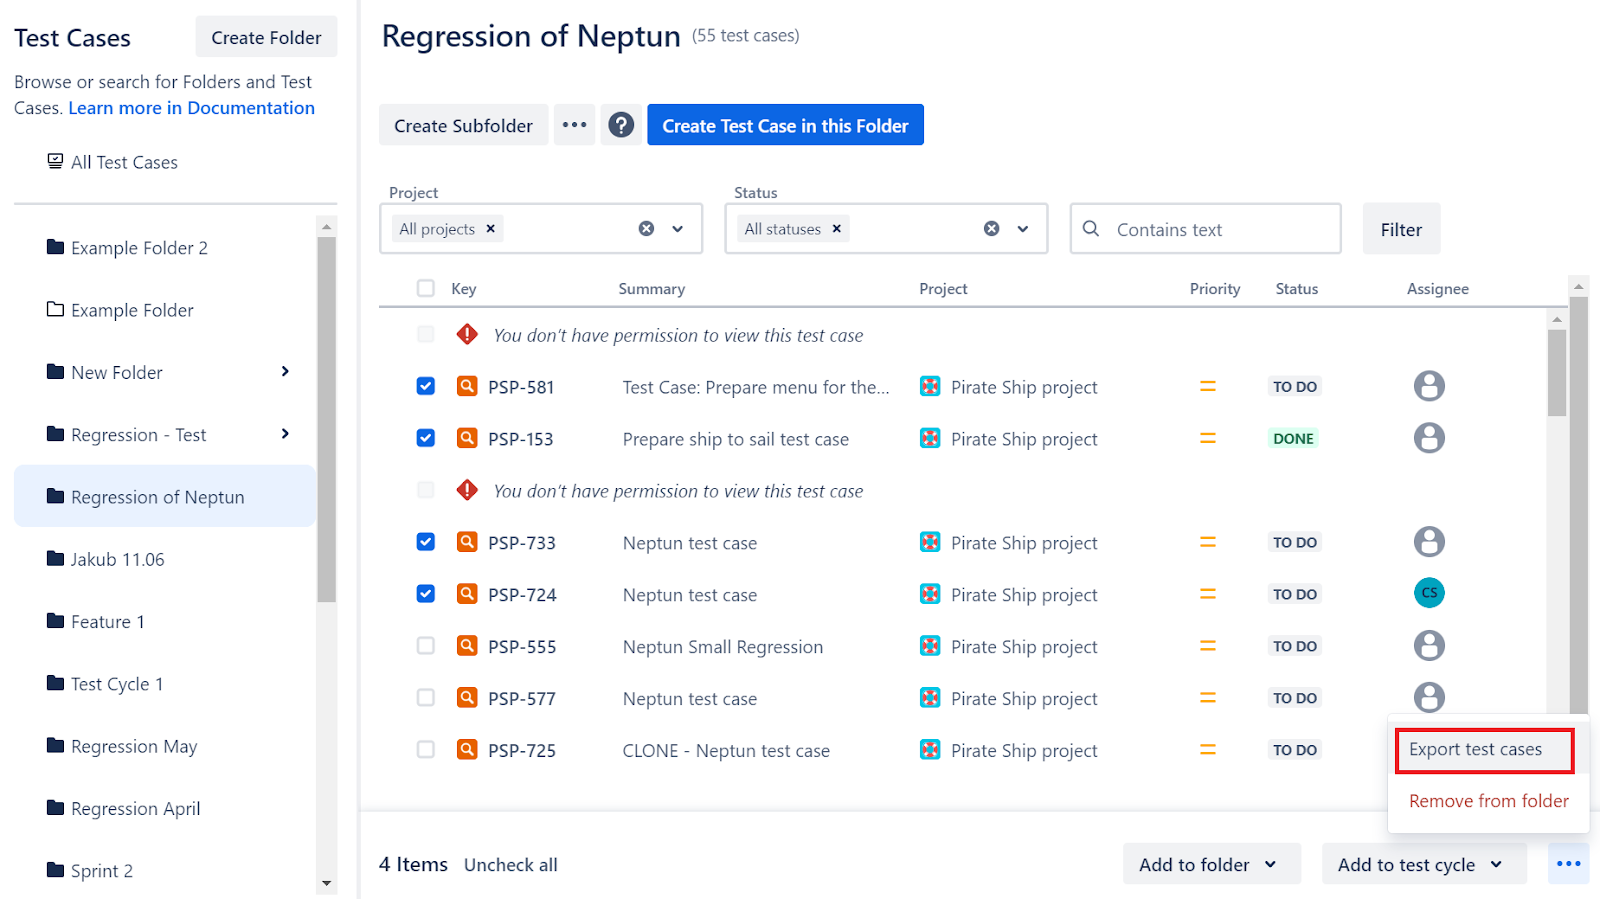
You can also export test cases to a CSV file. To do that, select test cases you want to export, click on the three dots at the bottom right corner, and choose Export test cases.
Adding test cases to a test cycle
Since folders often serve as an organizational tool that allows testers to prepare the groups of test cases that are to be executed together, you can also easily add selected test cases to a test cycle (new or already existing one).
If you have any questions or would like to chat with us about QAlity Plus, feel free to contact us and share your thoughts.
Was this helpful?
Thanks!
Kinga -SolDevelo-
0 comments